 Andrew Betts


When I bought the house it had some really cool leaded glass in various places - one of the front windows had it, some sliding doors in the basement, and some internal doors, all hand made by the previous owner. But the internal doors had to go: they were too short for my apparently giraffe-like stature and I was opening up the layout so needed fewer doors anyway.
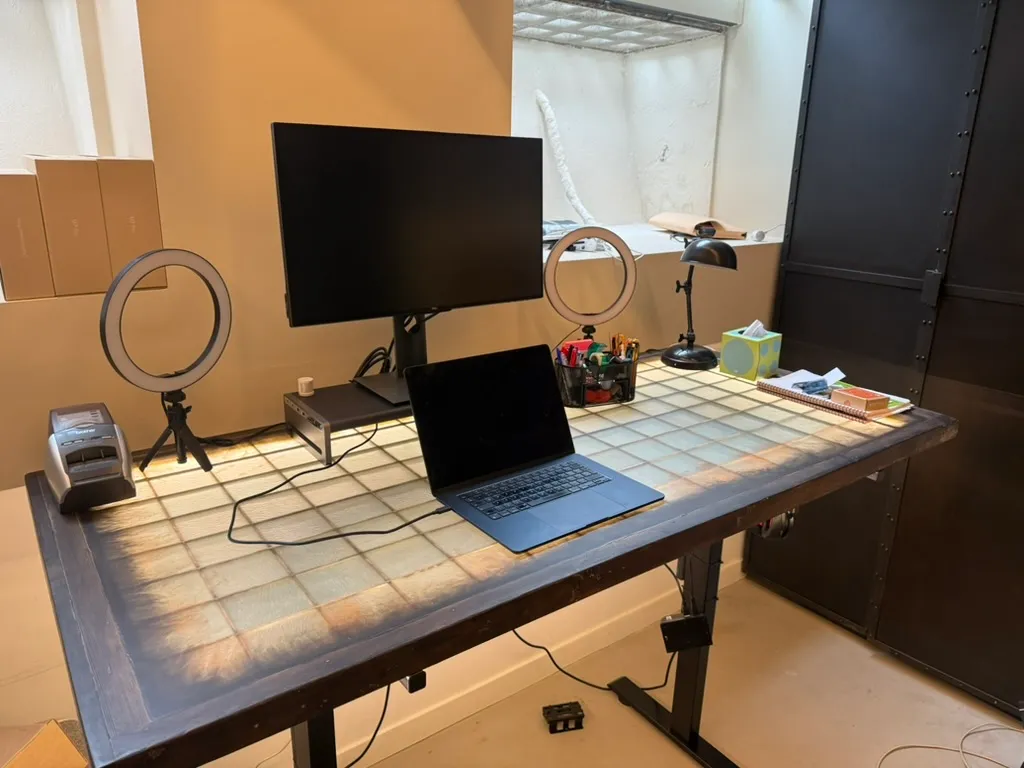
One of those doors is now my desk:
This was a major labour of love and involved learning a lot of things I didn’t know anything about, so I probably messed up a lot of it, but hey it was fun and I don’t hate what I ended up with. It is not perfect but it’s a nice way to preserve the heritage of the house. Here’s the full story!
Getting inspired
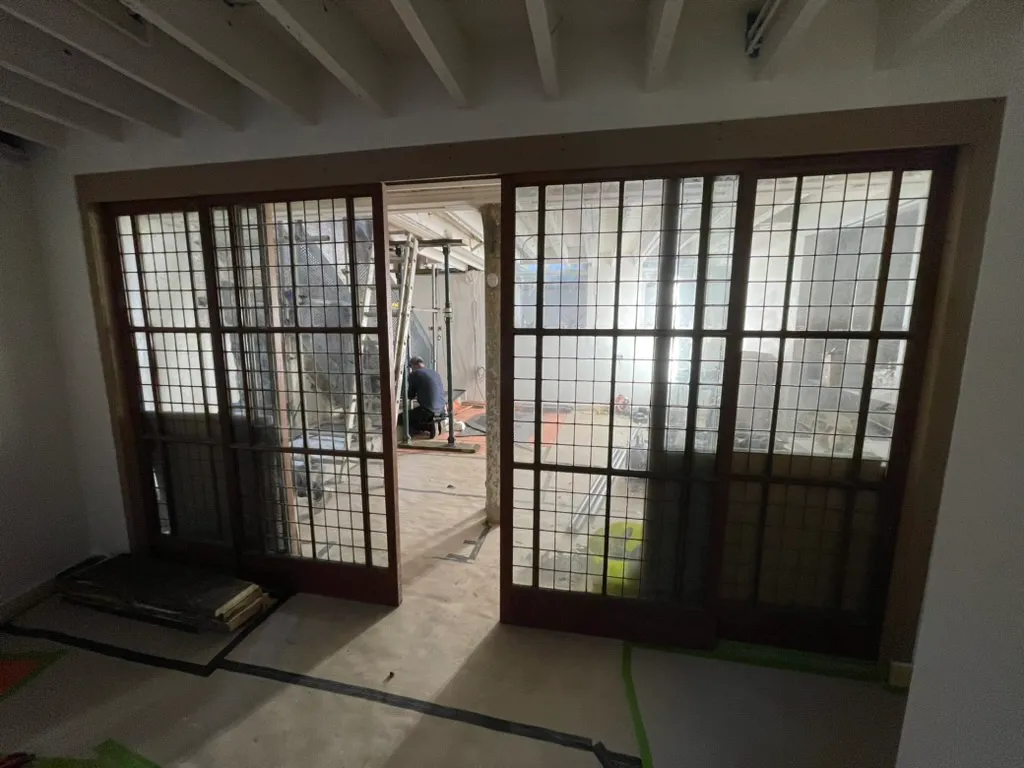
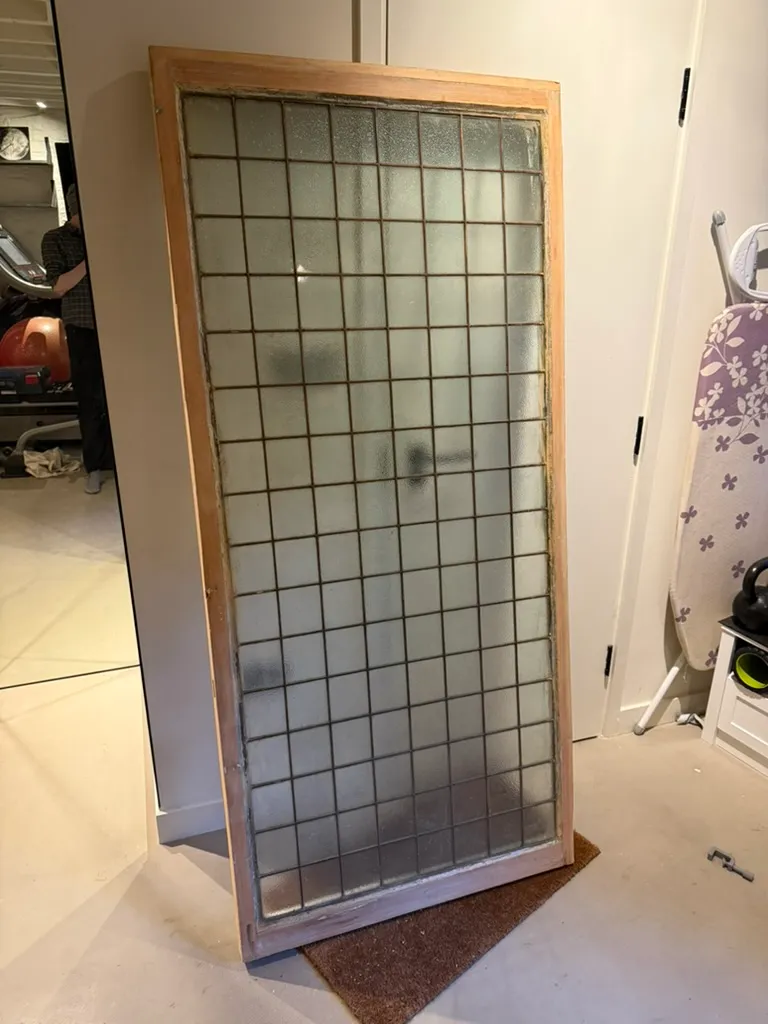
I just can’t throw these old doors away, because there’s so much of the same glass which is still part of the house. Here are the sliding doors in the basement, which I kept and are similar in style:
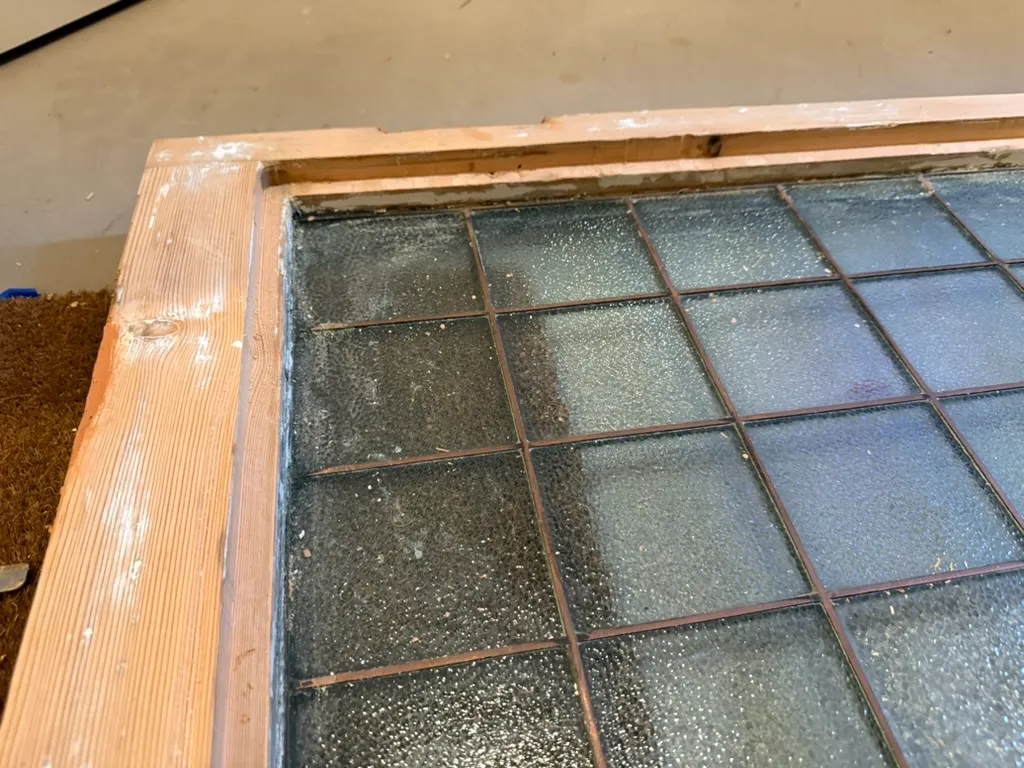
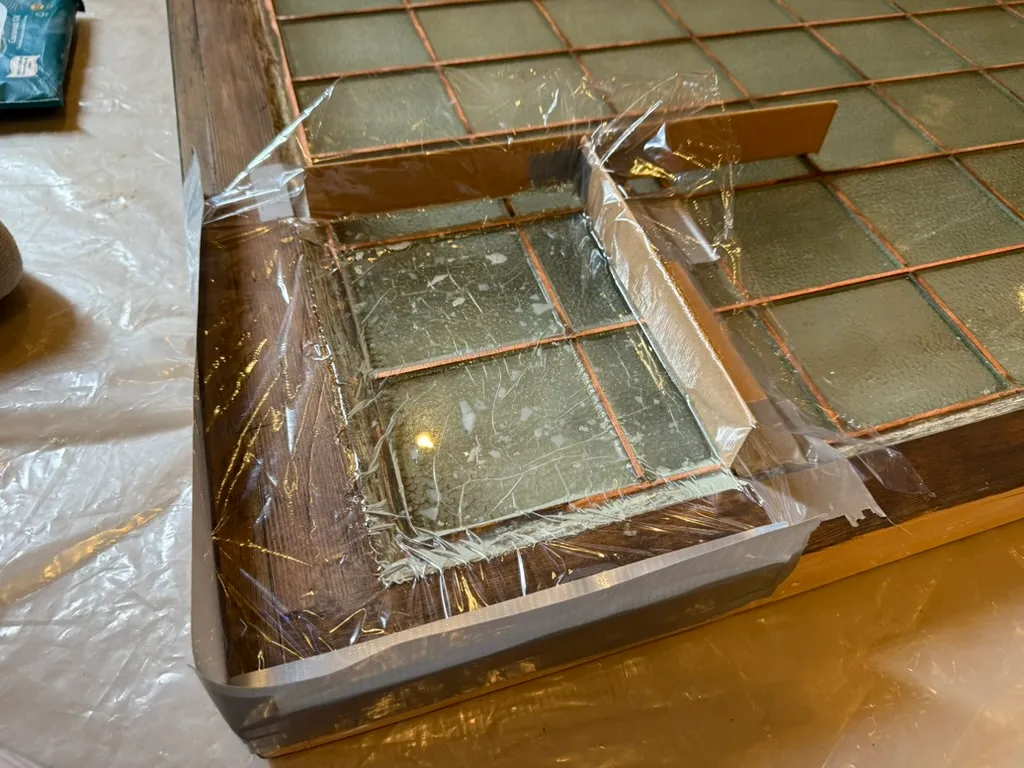
The doors we took out looked like this:
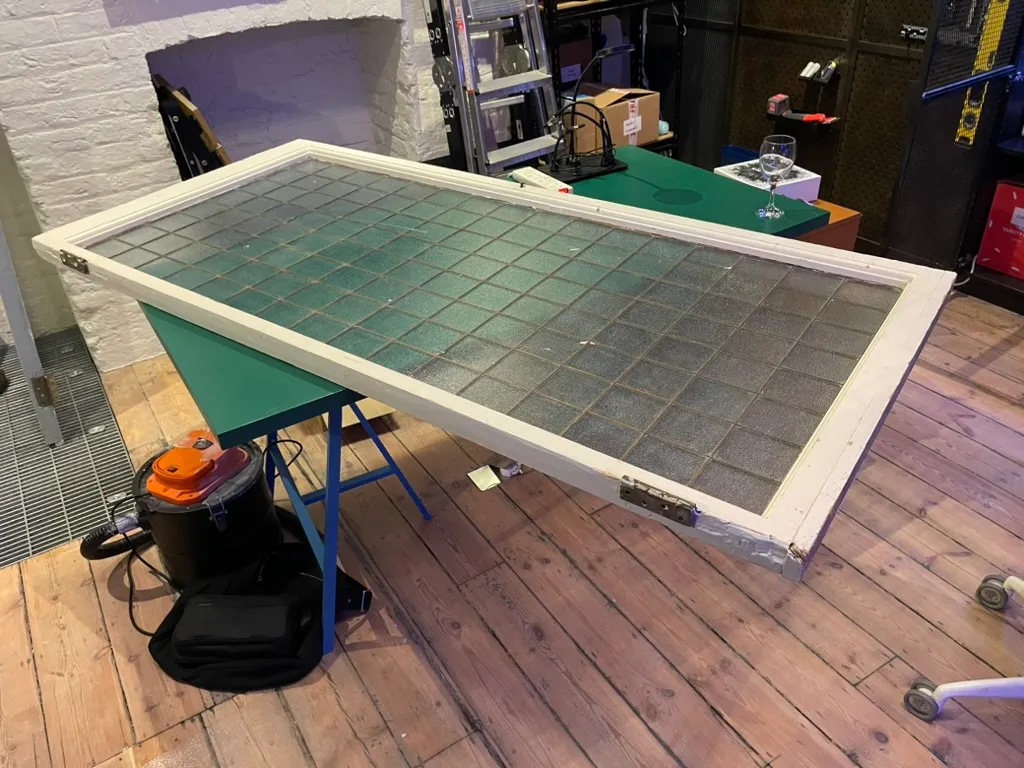
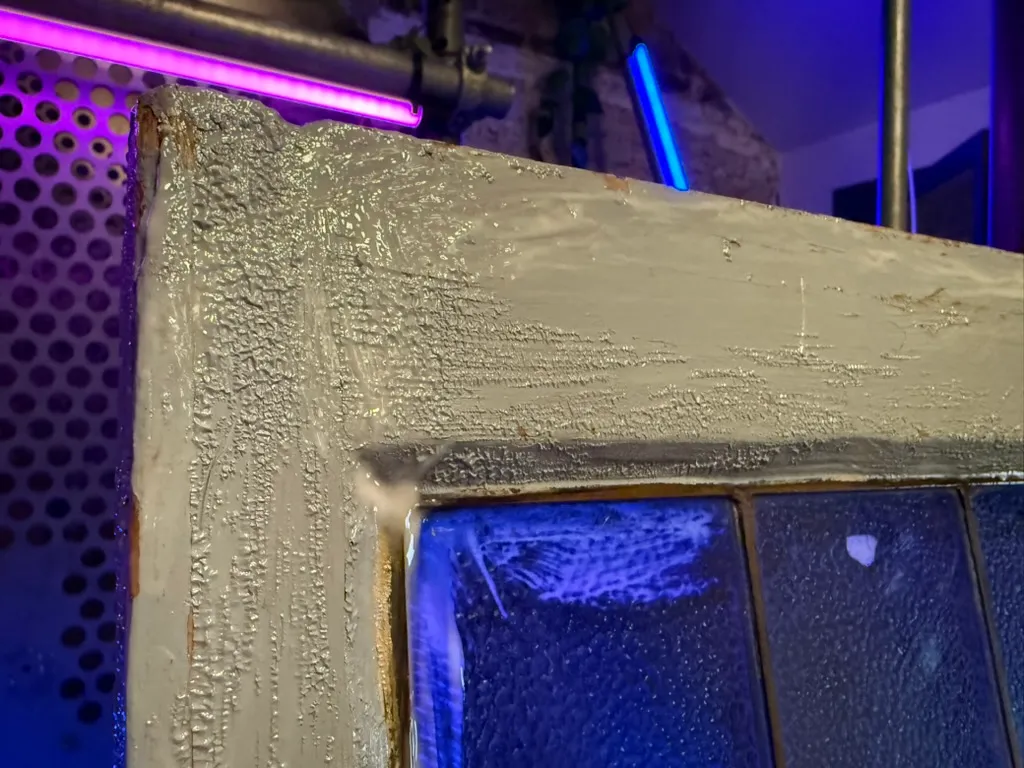
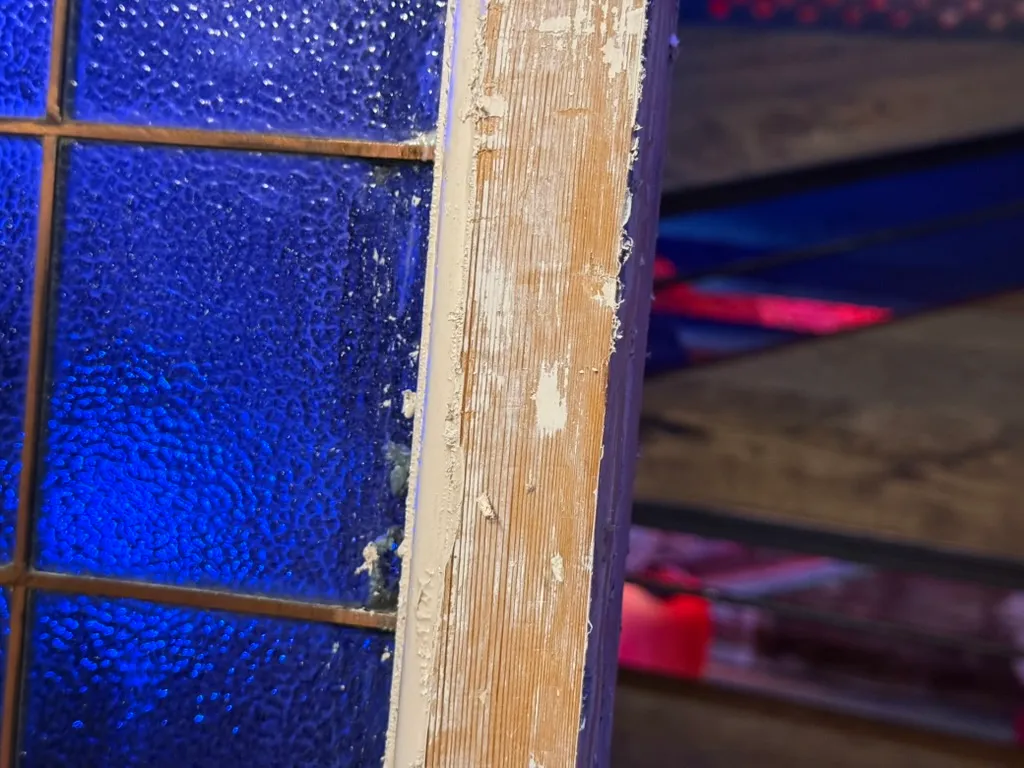
The photo here shows the “deep” side of the door, where the glass is set behind a wood baton and then a piece of curved edging that connects it to the main frame. On the other, ‘shallow’ side, the glass is kept in the frame against the wood baton with putty and (as I later discovered) a lot of metal tacks. The guy who made these was not kidding around.
The plan is to raise the level of the shallow side using epoxy resin, so that the surface ends up completely flat and level (right now even the glass is not flat because the lead creates ridges every 10cm, and the outside frame is about 11mm higher than the glass surface). On the deep side, I figure I can cut a channel into the inside edge of the frame, install some LEDs and light up the desk surface.
There’s a lot to do here. I started by removing the hinges and knobs, but then made a plan for how to turn this into a fab work desk:
- Strip the paint
- Sand it down
- Fill the holes
- Remove the edging on the deep side
- Rout a channel into the inside of the frame on the deep side for LEDs
- Clean the glass
- Stain the wood
- Pour epoxy resin on the shallow side
- Sand the epoxy smooth and level with the frame
- Re-stain any parts of the frame that got sanded
- Apply a wax oil finish
- Screw the frame to steel box sections
- Mount the steel supports onto a standing desk base
I do not know how to do any of this. I’ve never stripped paint, stained wood, used epoxy resin, or cut steel. And all of those things I now need to do on quite a large scale. The epoxy in particular. Let’s do the maths:
180cm long x 75cm deep x 11mm thick = ~14 litres of resin
OK so 14 litres of resin, that seems perfectly fine for my first resin project.
I need help.
Learning how to resin
Time to consult a professional. I signed up for an entry level resin course at The River Shop, and met Richard who immediately seemed to be the kind of precision-minded craftsperson that I needed. (I have never been accused of being an ‘influencer’ of any kind but just for clarity I don’t have any relationship to the River Shop except as a customer and they don’t know I’m writing this)
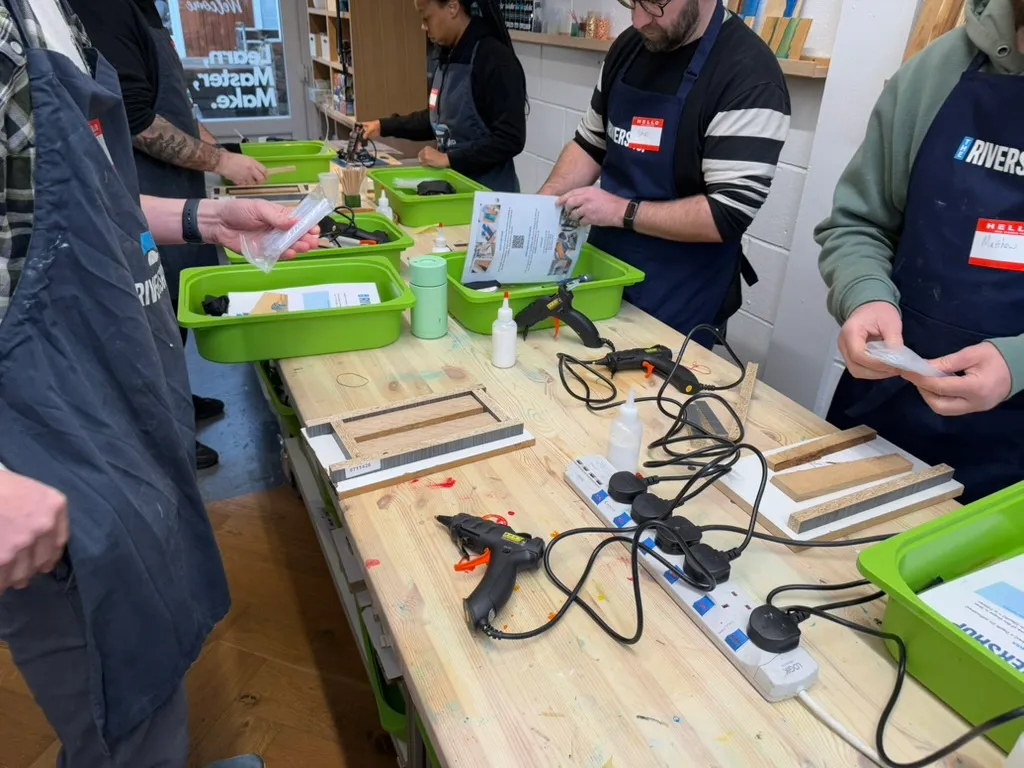
The River Shop’s course has you make a ‘drinks coaster’ - basically pairing a small bit of wood with around 50-200ml of resin. You can pay an upgrade to make a ‘charcuterie board’ (a big bit of wood with around a litre of resin). Anyway here we are learning resin things:
It quickly became obvious that there are a bunch of things I need to know to make my resin project not a total disaster:
- Mixing is absolutely crucial, and to mix 15 litres I’m gonna need a mixing attachment for a drill
- After mixing, you have to pour the resin into a new bucket and mix it again. This is called double-potting.
- Dyes come in both powders and liquid dyes, and are pretty strong!
- Working time is pretty short, so don’t be stingy when mixing resin.
- If you plan to colour the resin, do it all at once - you don’t want to have to match a colour you mixed before
Right, so now I’m a resin expert, let’s do this thing.
Paint stripping
I got myself some paint stripper (I used Bartoline TX10, just because it was in a convenient size on Amazon and had reasonable reviews). How much do I need. Dunno. 500ml is surely enough right? Anyway I slathered that on all over the frame:
Wow! Look at that. Kind of feel sorry for the paint. Next gloves on, scraper in hand, get all that gunk off.
Here’s where we are after a bunch of scraping:
The remnants need to get sanded off, so I went ahead and hired a sander from Library of Things, a service I really love that puts stuff like sanders, drills, jet wash machines etc in lockers in places like libraries and public buildings, and you can pay a small fee to borrow it for the day. There’s one around a mile from my house and borrowing the sander cost me £12.
Sanding is hard. OMG. So boring. And sadly you can’t just snap your fingers like in those instragram reels of people making this kind of thing.
Sanding done. No more paint.
Wood filler
A bunch of holes in the frame now needed to be filled, and I plan to stain the wood rather than paint it so I needed a filler that would match the wood and be hidden by the stain.
My friend Kai, who takes woodworking very seriously, advised me that the solution was a sawdust/PVA mix made from the same wood. OK sure, I mean I guess you could do that. But it turned out there was already a bunch of filler in the wood from when it was made into a door last time around, so I figure it doesn’t actually need to be that perfect.
I ended up just buying some wood filler that claimed to be stainable and was a reasonable match for the wood. I did at least pay attention to building up the filler in layers where I needed to fill the deeper holes in the frame.
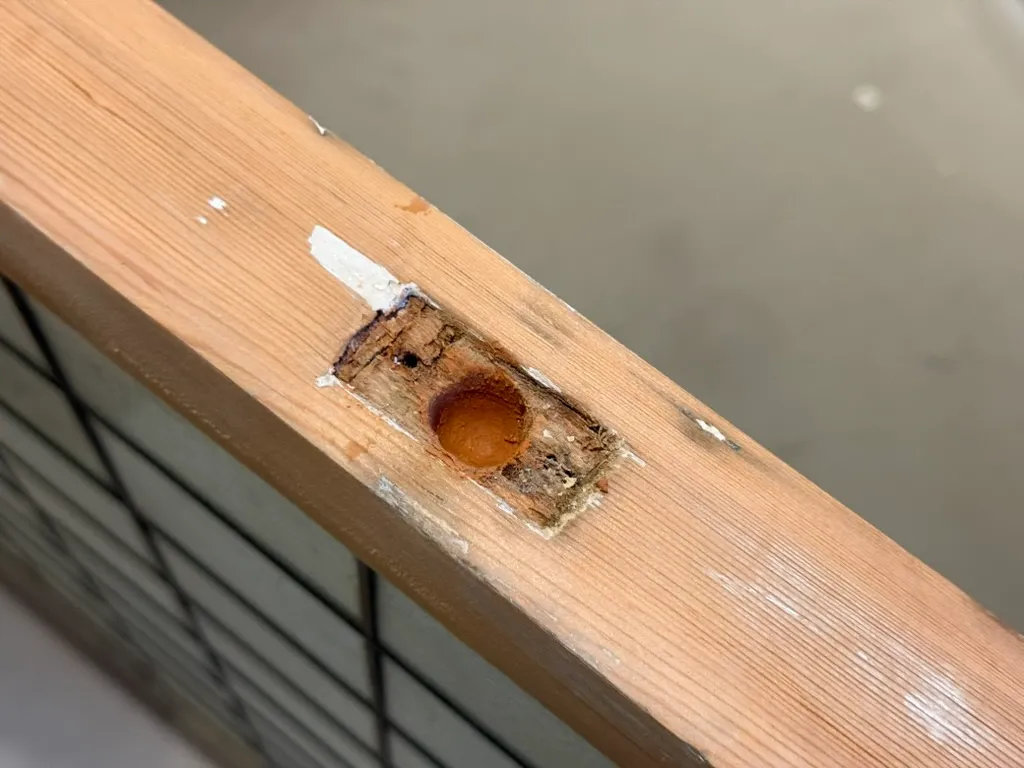
The biggest areas to fill were the cutouts where I had removed the hinges, but the latch hole (pictured above) was the deepest hole to fill. There were also a bunch of gouges in the frame that I tried to fill while I was at it.
Removing the edging and cutting a channel for LEDs
I tried to pull the edging off and hoped I could just break the glue but whatever it’s glued on with is stronger than the wood itself so another trip to Library of Things got me a hand router.
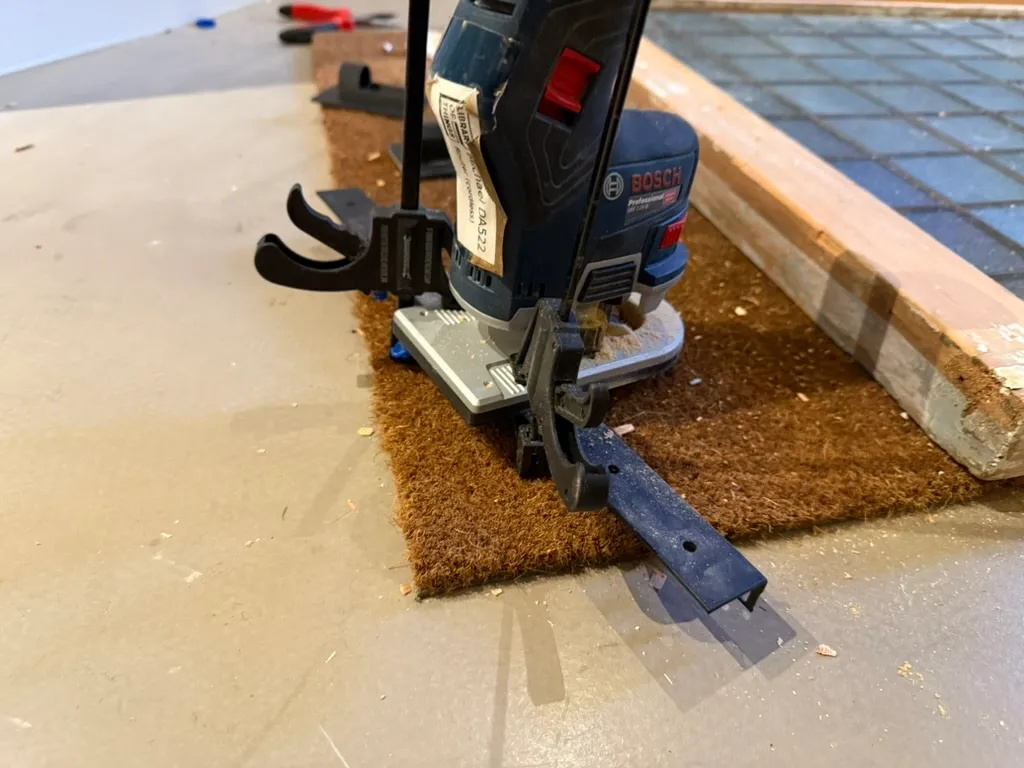
And that made pretty short work of the edging, leaving us with just the baton on which the glass is sitting:
Now, because the desk is transparent/translucent, and I’m obessed with LED projects, I wanted to illuminate the desk from underneath. That meant cutting a slot in the wood that I could run an LED strip in.
The right way to do this (thanks again Kai) is to use a slot cutting bit on a router. But in my case I wanted the slot to be in the very end of a surface, so there’s no space for the slot cutting bit to rest against the material on the other side of the slot.
But I do have a dremel. And a 3D printer. So I got myself a set of routing bits for my dremel, designed and printed a jig, and used the dremel to cut my slot:
This was … not a great idea. But it kinda worked.
Cleaning and staining
I gave the glass a good clean, and then rubbed on the stain. I used ebony black Rustins wood dye. It covered my filler beautifully but sadly the older filler just poked striaght through it!
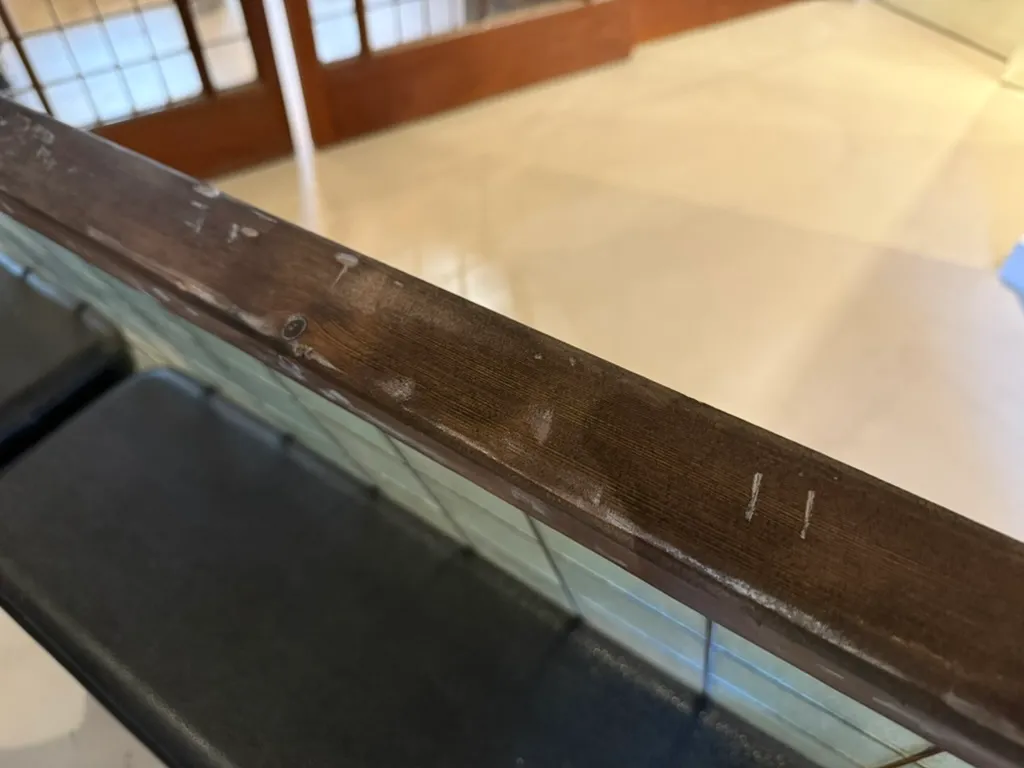
With Kai’s advice ringing in my ears, I did give some thought to trying to dig it all out and fill it with sawdust or my better filler, and even thought about maybe giving up on staining and just paint it instead. But if I did that I wouldn’t have needed to spend a whole day sanding it earlier, and I’m a sucker for a sunk cost fallacy, so let’s just live with it.
Adventures in resin
Right, time to see what we can do with the resin. I started with some resin my friend Rob had had sitting in his garage for a long time. It had gone kind of lumpy (I later found out that I could have warmed it up to fix that) but it was good enough to practice mixing and checking the depth of the pour. Now, how could I pour resin onto the glass in a way that would not bond, and allow me to remove the resin afterwards?
I considered oiling or greasing the glass, but that seemed messy, hard to get even, and if even a single spot was missed I think the resin would bond and I’d be done for. So I used cling wrap.
Happy to say it did not bond and I was able to peel the cling wrap off the resin after curing. I ended up doing a bunch of these, each time mxing different amounts of clear and coloured resin and testing the effects of pouring them in a different order and mixing them together in various ways.
I was aiming for a kind of ‘vignette’ effect, where the glass should darken towards the edges.
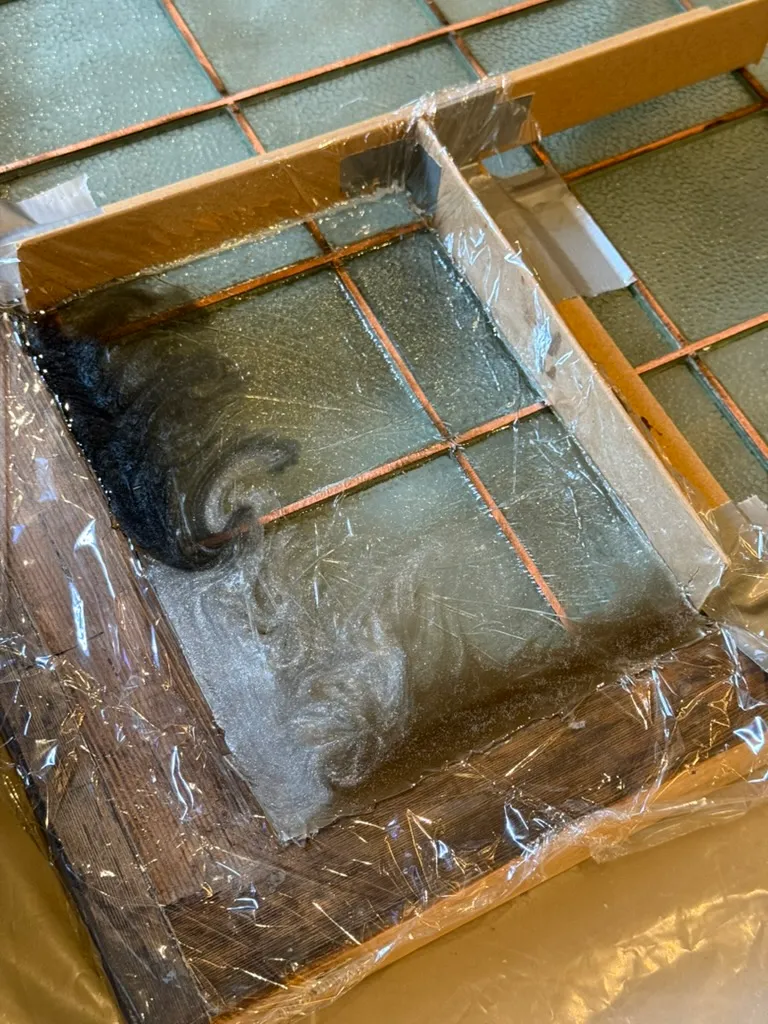
Finally it was time for the BIG POUR - I mixed 12 litres of clear resin, a litre of grey and 200ml of metallic bronze, and went for it. I bought a few inflatable airbags on Amazon and placed them under the corners of the door so that I could adjust the tilt after pouring and make sure the resin was level with all four sides.
Voila:
Smashed it. Super happy with this.
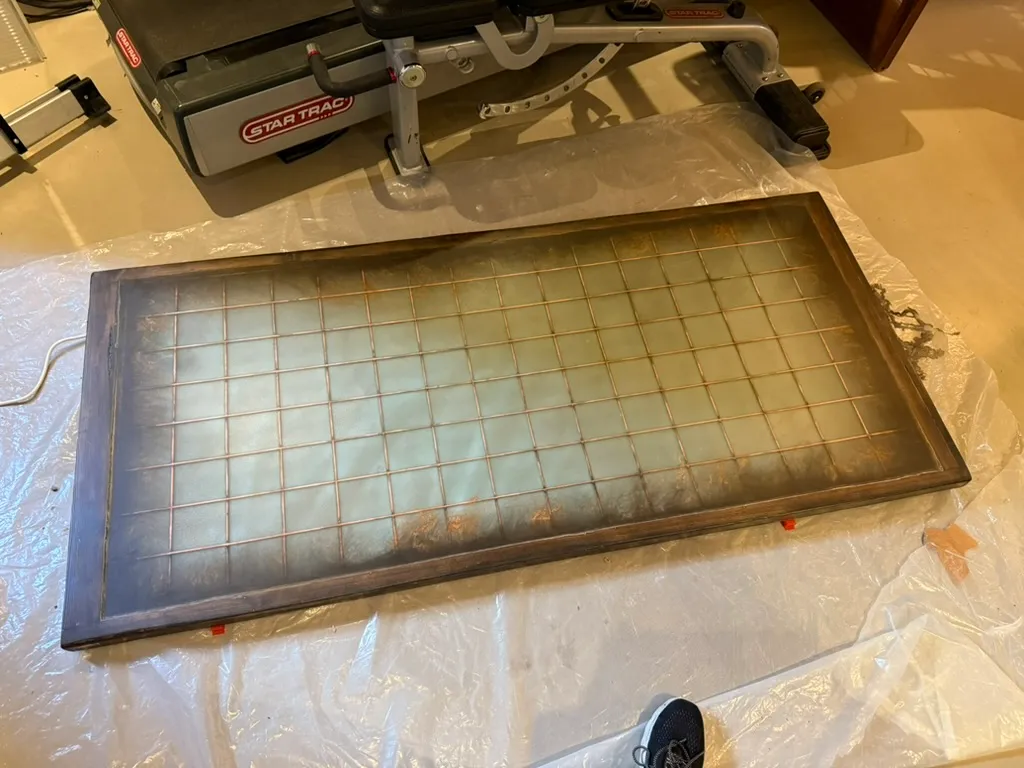
Sanding. So. Much. Sanding.
To get the resin to a perfect level with the wood, I needed to sand it again. A lot. Starting with 40 grit, moving up to 80, 120, 240… and at this point I had a bit of a revelation. I don’t actually want the resin to be clear! The glass is already marbled. Frosting the resin slightly will help diffuse the light from the LEDs underneath!
Also, I don’t really want to sand up to 2000 grit. Yeah it was mostly that.
After sanding, the stain needed touching up, so I restained the sanded areas and did the rest of the wood too for good measure.
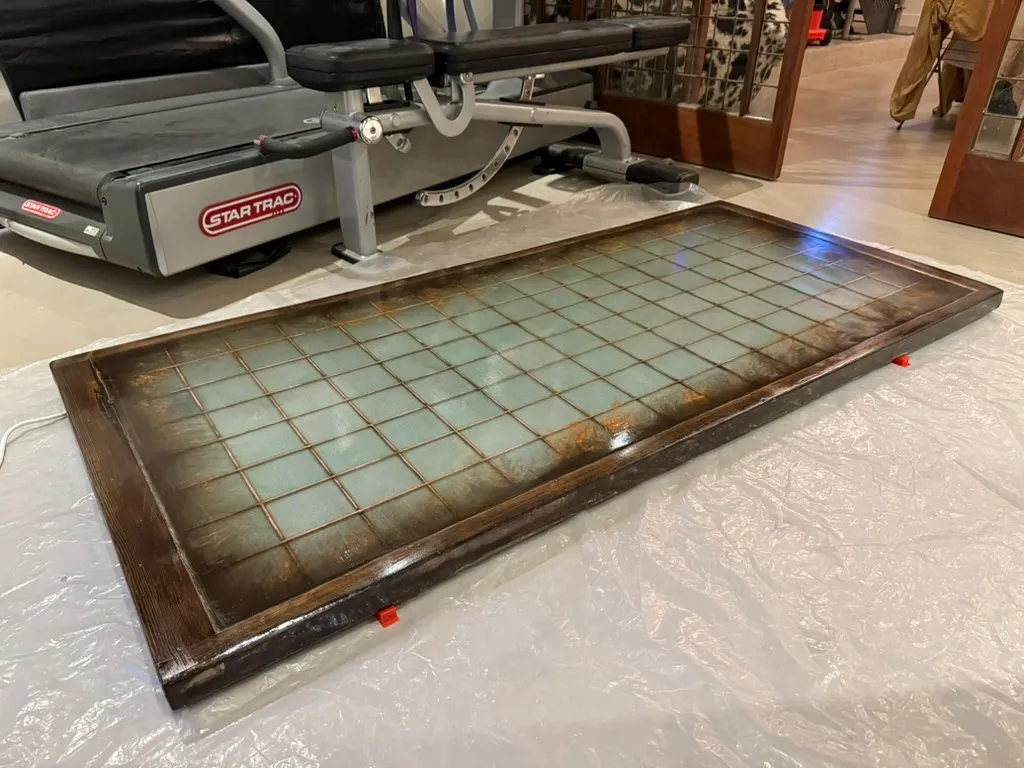
Hard wax oil
Next comes waxing. The resin and wood need protecting and waterproofing so the surface can be used as a desk top. I got some Osmo Polyx matte 3062 oil, and brushed it on, then rubbed off the excess with a non-linty cloth (actually I initially used a VERY linty cloth, realised immediately that my desk was now mostly cloth fibres, and had to do the wax again. Dumb.)
Interestingly the wax oil made the resin almost clear. So much for the frosting. And I’d never have known that if I’d sanded to 2000 grit like a lunatic.
Next up, legs.
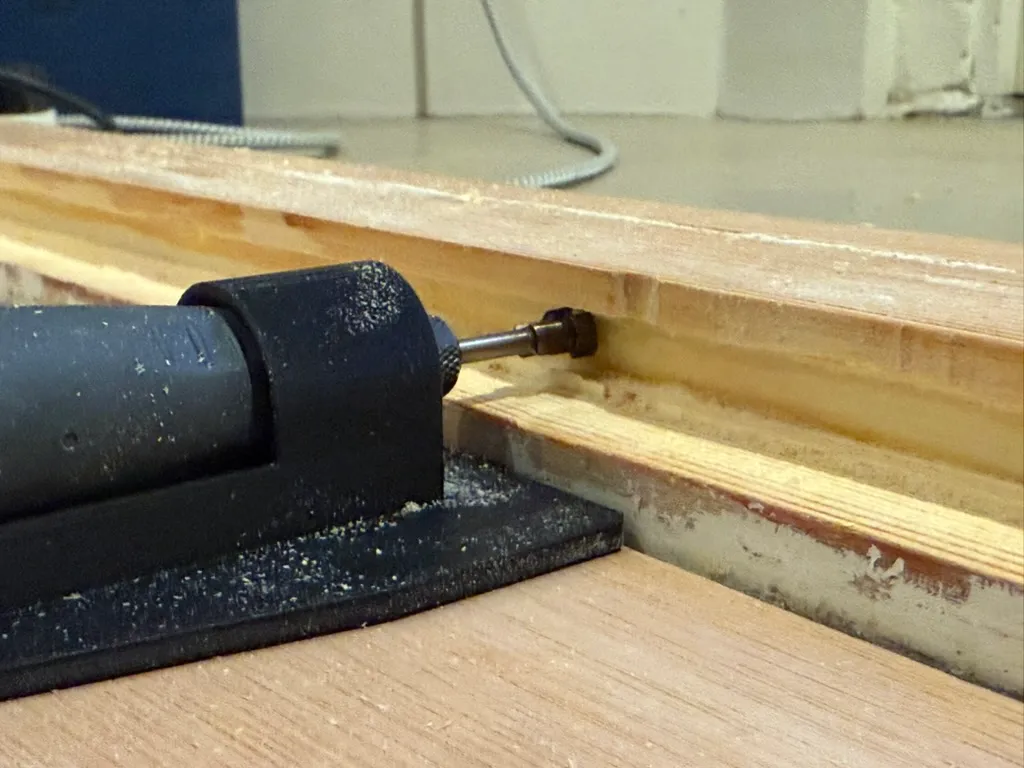
Steel support beams
I want to put this top on an existing standing desk frame that I already have, but it’s designed to screw into a solid wood desk top and to do so kind of across the middle of the surface.
That’s not gonna work when the desk bottom is mostly covered in glass. The only part you can screw into is the outer frame, and the standing desk base wasn’t designed to mount to the top in that way.
So I figured I could extend the brackets in the standing desk base to accomodate my new desk top, by bolting on a couple of bits of steel box section. I got ChatGPT to tell me what size box section I needed for the weight of my desk top (a now fairly impressive 50kg) and the expected weight of all the stuff I might put on it (I guessed another 50kg). It told me I had a “beam with overhangs” sitution and needed to calculate the “maximum bending moment”.
I pretended to understand this and was reasurred that it said 2mm thick, 20mm cross section steel box should be plenty strong enough.

Library of Things also rents angle grinders, so another £12 later I had my very own angle grinder for the day and my friend Tom came over to try and stop me from killing myself with it.
The steel needed holes drilled for the bolts and screws, so I started them off with a dremel in a drill press, and enlarged them with a cordless drill. Drilling metal turns out to be surprisingly … possible, if not particularly easy. The barbs are also absolutely lethal. If you ever do this, wear lots of protection, use a slow drill speed, and oil the drill bit regularly. It will be messy.
Closing in on victory
Finally, all that remains is to wash the steel to remove the drill oil and shards of metal, dry it, bolt it to the standing desk frame, and then slide the new desk top on top. I secured it with screws at each end of the steel beams.
To close off the ends of the steel box sections, I 3D printed some end caps which fitted into the ends perfectly.

And we’re done! I fitted some LEDs to the recessed channel I’d made underneath, hot-glued them in, and connected them to a 24V driver.
Was it worth it? Probably not. But what else was I going to do with that glass panel. And I do have a second one, so I may need a new idea.